How to Waterproof A House BoatUpdated 9 months ago
Houseboat Waterproofing Guide
Waterproofing your houseboat is essential to protect it from harsh marine conditions, prevent leaks, and extend its lifespan. Using Liquid Rubber DIY products, you can create a strong, flexible, and watertight barrier to keep your houseboat in top condition. Follow this step-by-step guide for a professional, long-lasting finish.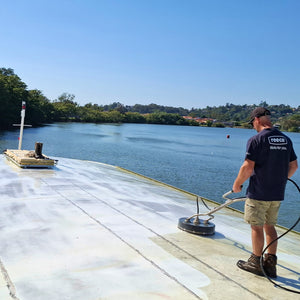
Why Waterproof Your Houseboat?
- Prevent Leaks: Seals seams, joins, and cracks, preventing water intrusion.
- Protect Against Corrosion: Shields metal and wood surfaces from rust and decay.
- Enhance Longevity: Increases the lifespan of your houseboat by reinforcing vulnerable areas.
- Reduce Maintenance Costs: A properly waterproofed surface reduces the need for frequent repairs.
What You’ll Need
Before starting, gather the following tools and materials:
- Liquid Rubber DIY Waterproof Sealant
- Geo-Textile: For reinforcing seams, joints, vents, skylights, and other vulnerable areas.
- Rapid Cure Spray (Optional): Speeds up curing time.
- Primer/Sealer:
- For painted or previously coated surfaces, use Primer/Sealer.
- For raw metal surfaces or areas sanded down to the metal, use Etch Primer.
- Thermal Coating: White is recommended for optimal heat reflection and UV protection.
- Cleaning Supplies: High-pressure water, detergent, stiff brush, scrubbing pad.
- Repair Tools: Patch repair kit for any pre-existing damage.
- Application Tools: Roller, brush, or spray equipment.
- Safety Gear: Gloves, safety goggles, and a dust mask.
- Weather Considerations: Choose a dry day with moderate temperatures, avoiding direct sunlight during application.
Use the House Kit Calculator on our website to determine the exact amount of product you’ll need.
Step-by-Step Instructions
1. Clean and Prepare the Surface
- Wash or water-blast the entire houseboat roof or deck surface to remove dirt, debris, and old coatings.
- Use a leaf blower to remove excess water and ensure the surface is completely dry before applying any product.
2. Reinforce Seams, Joins, and Holes
- Pre-cut Geo-Textile to fit over seams, joins, and any holes.
- Apply Liquid Rubber Waterproof Sealant with a brush over these areas before embedding the pre-cut Geo-Textile into the wet sealant.
- Smooth out the textile to remove any air bubbles or wrinkles.
- Once set, instantly spray Rapid Cure Spray to secure the area and speed up the drying process.
3. Seal Screws, Rust, and Railings
- Screws do not require Geo-Textile—simply apply a small amount of Waterproof Sealant over them with a gloved finger.
- Spray Rapid Cure Spray over the treated screws to instantly set the sealant.
- Apply Waterproof Sealant to surface rust, pipes, and railing bases for extra protection. Allow it to cure before proceeding.
4. Apply Waterproof Sealant to the Full Surface
- Once the initial reinforced areas are dry, apply a first coat of Waterproof Sealant using a brush, roller, or spray machine to the entire houseboat roof or deck.
- If rain is expected or to speed up curing, spray Rapid Cure Spray immediately after application.
5. Apply the Final Waterproofing Layers
- Apply a second coat of Waterproof Sealant across the entire surface to ensure a complete waterproof barrier. Additional coats can be applied if required.
- Recommended thickness: 1.5mm dry-film (approximately 2 liters per square meter).
- Allow the product to cure for at least 24 hours per 1mm of thickness (longer in colder weather). A full cure usually takes 2-3 days for optimal performance.
6. Apply the Protective Coating
- Once fully cured, clean the surface again to remove any dirt, salt, or natural debris that may have settled.
- If the surface was previously painted, apply Sealer before adding the final coating. If working with raw metal, apply Etch Primer to ensure proper adhesion.
- Once dry, apply Thermal Coating for additional UV protection and heat reflection. Apply 3 coats over the Waterproof Sealant or 2 coats minimum over primed metal surfaces.
Additional Tips
- Apply products in the early morning or late afternoon to avoid direct sunlight.
- Always ensure surfaces are completely dry before application.
- Use Rapid Cure Spray to set the product quickly and reduce curing time, especially if rain is approaching.
- Waterproofing works best in temperatures between 10°C and 32°C.